Understand Layout inside Aritic Landing Page Builder
A layout is a plan that helps to arrange the visual elements of a page. Inside the Aritic application, you have to learn how to set up the page layout and customize the drag and drop template. With the help of the layout editor, you can quickly design your landing page without using HTML.
1. Go To Aritic PinPoint dashboard choose left menu and under “Assets” click on “Landing Pages” as shown below.

2. Click on “+Design New Landing Page” on the top right corner.

3. Choose any Theme and click on “Next“ as shown in below screenshot.

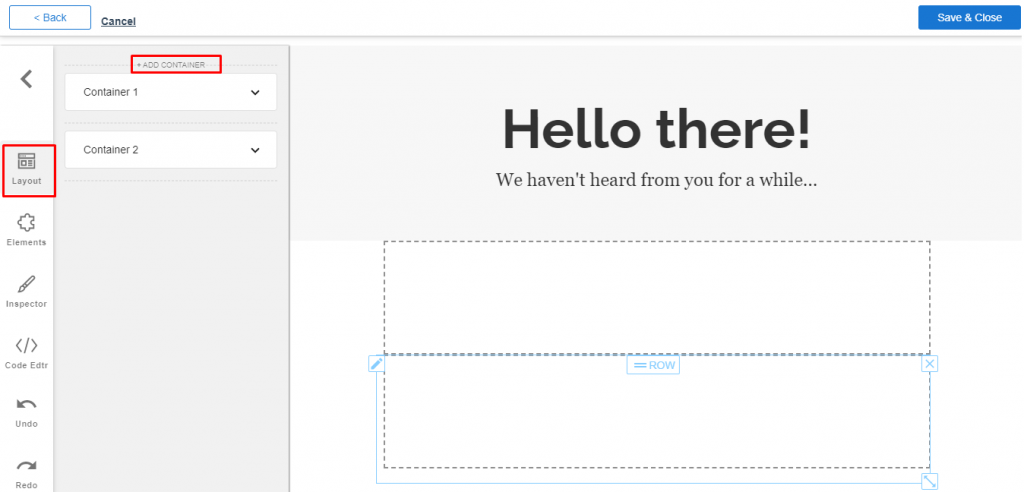
4. Inside the layout, there are features for designing templates. In the left column there is option for adding multiple container as shown in the screenshot.
Note: Container divides the landing page into multiple vertical blocks wherein you can design the blocks into elements of rows and columns.
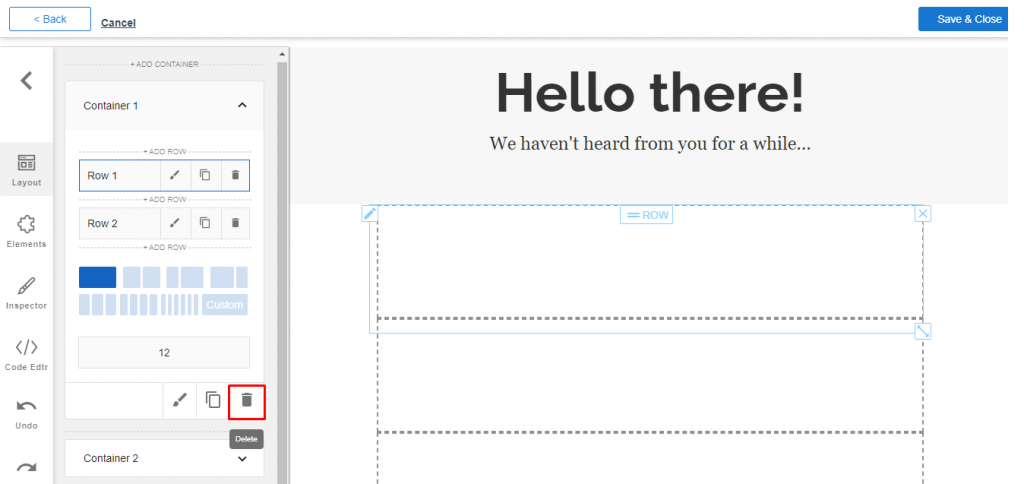
5. Inside the container there are features for designing container into multiple rows and columns. It also has features to modify, clone and delete individual container, Below is the brief about the designing individual container.
a. Inside the individual container you can add multiple rows using “Add Row” option as shown in the screenshot.

b. Inside the individual container there is option for modifying you can modify using “Modify” option as shown in the screenshot.

c. Inside the individual container there is option for cloning using “Clone” option as shown in the screenshot.

d. The individual container can be deleted using “Delete” option as shown in the screenshot.
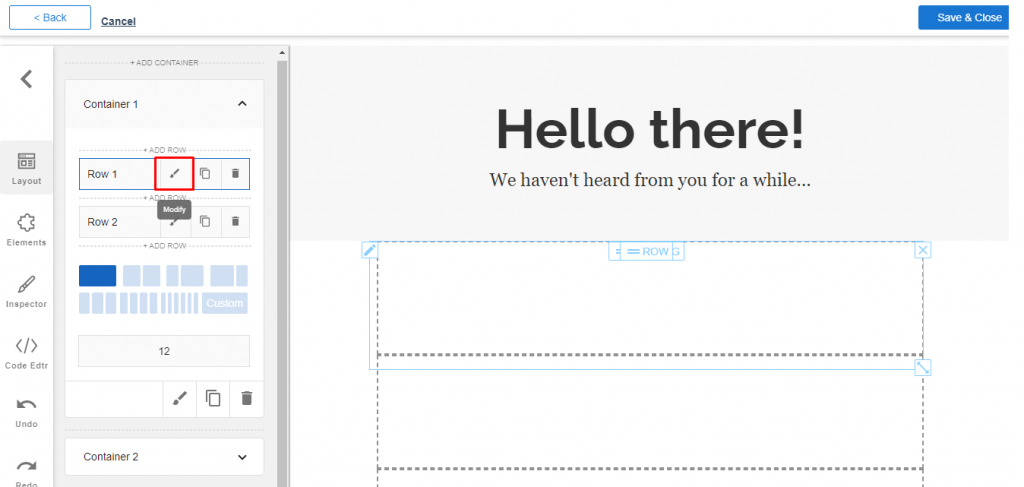
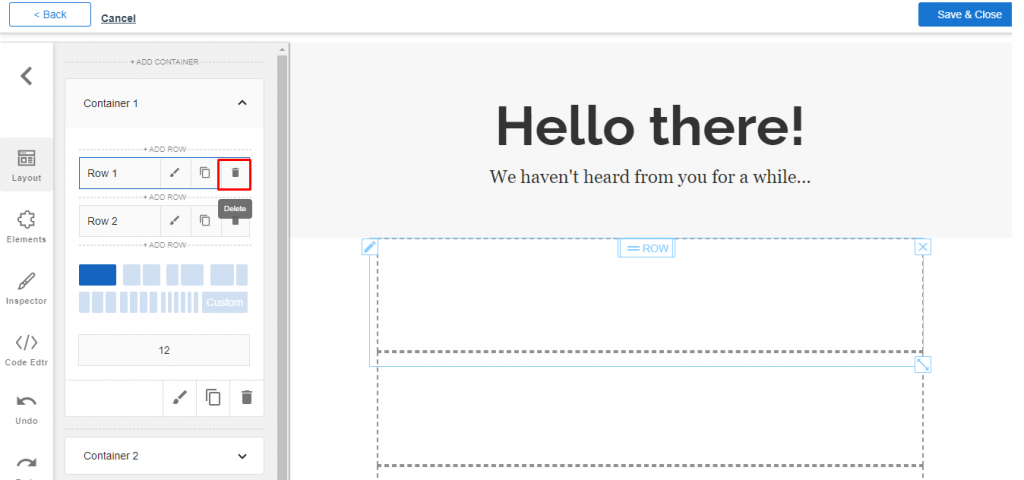
6. Inside the individual container row there are features for designing individual container row into multiple columns. It also has features to modify, clone and delete individual container row. Below is the brief about individual container row.
a. Inside container row there is option for modifying using “Modify” option as shown in the screenshot.
b. Inside the container row there is option for cloning using “Clone” option as shown in the screenshot.

c. The individual container row can be deleted using “Delete” option as shown in the screenshot.
7. The individual container row can be designed into multiple columns. The column size can be viewed as shown in the screenshot. Below is the brief of creation on different measurement of columns.
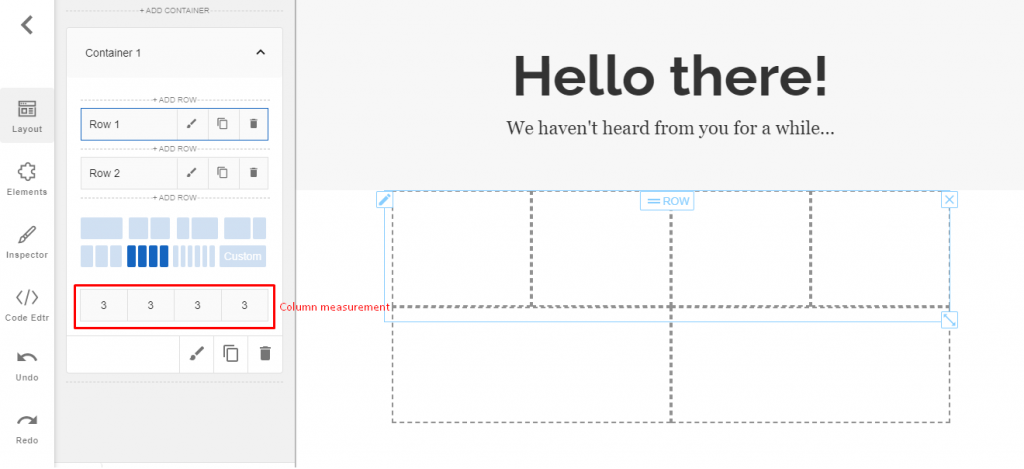
a. The individual row can be divided into single column and two columns of equal parts as shown in the screenshot.
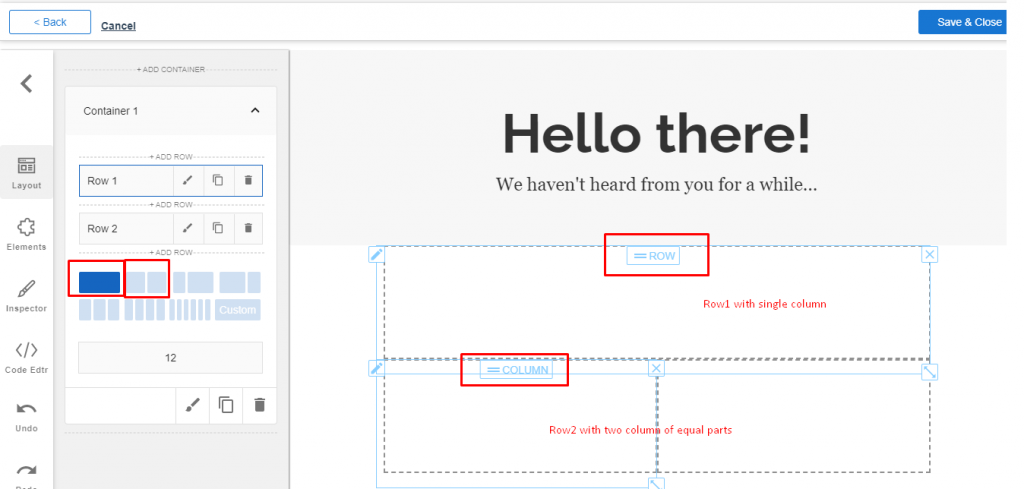
b. The individual row can be divided into two different 3/4 part of a row as shown in the screenshot.

c. The individual row can be divided into three column, four column and six column row of equal parts as shown in the screenshot.
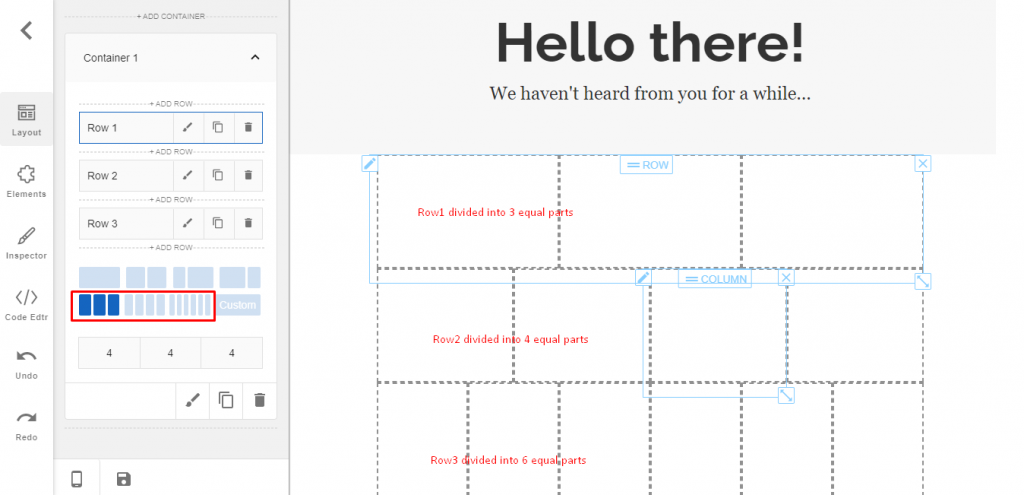
d. The individual row can be customized as per your requirement as shown in the screenshot

Once you have selected the new landing page layout and created an individual container row, you can optimize the new page for different marketing campaigns to bring more conversion rates.
Still Not an User of Aritic PinPoint Automation?

0 Comments