In this article, you’ll learn how to Integrate with “Facebook” in Aritic.
Here are the requirement:-
a) Aritic PinPoint user account
b)Facebook Developer account
Follow the steps below to configure Facebook Developer account with Aritic PinPoint.
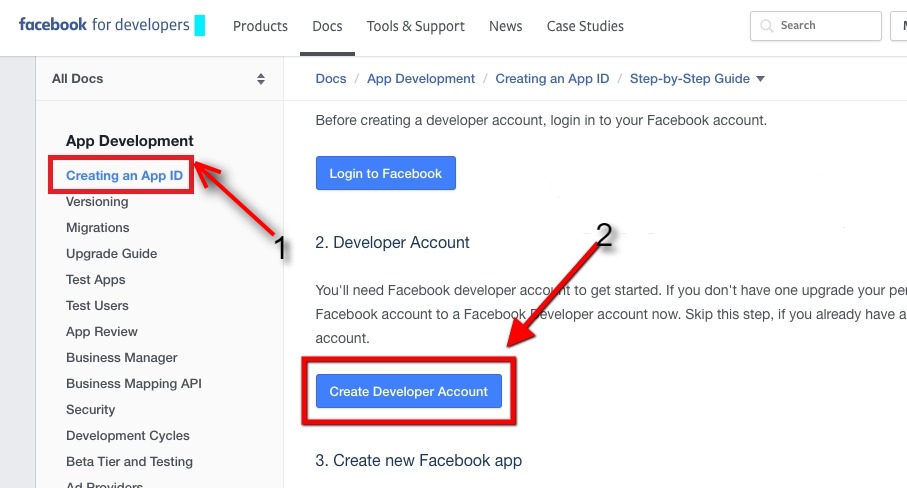
1. Login to your Facebook Developer account.
2. Go to Creating an App ID.
3. Click here to Create Developer Account.
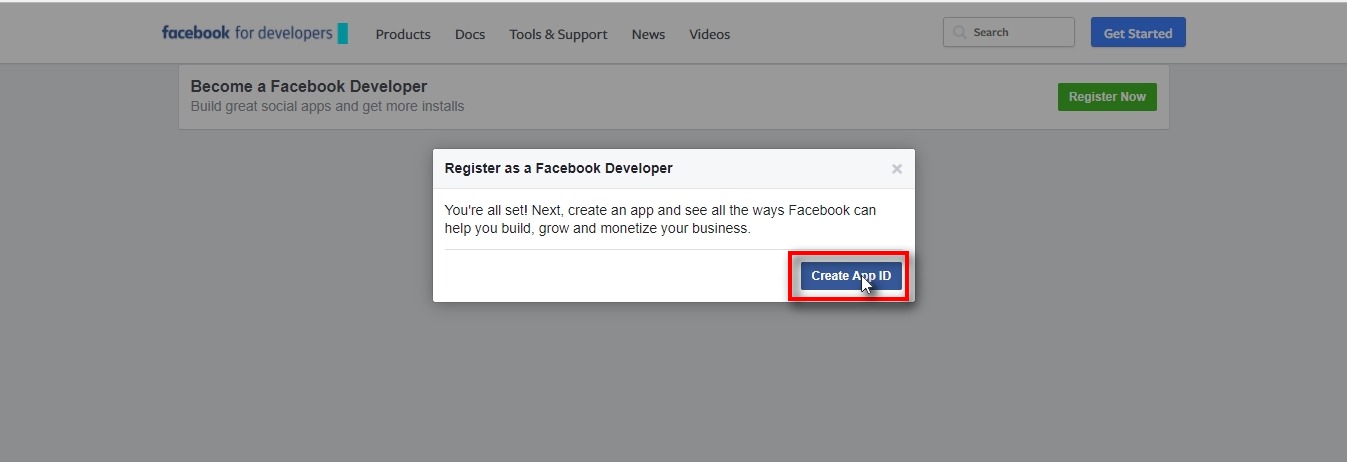
4. After Creating the Developer Account.
5. Click on Register New.
6. Click to Create App ID
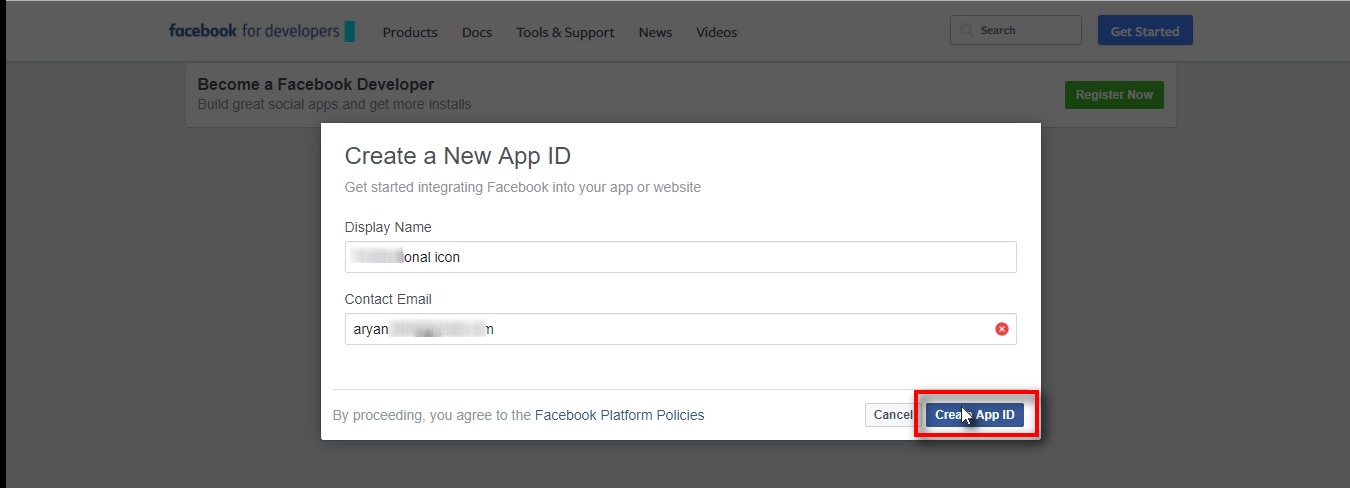
7. Fill the required field: a) Display Name and b) Contact Email
8. Click on Create App ID
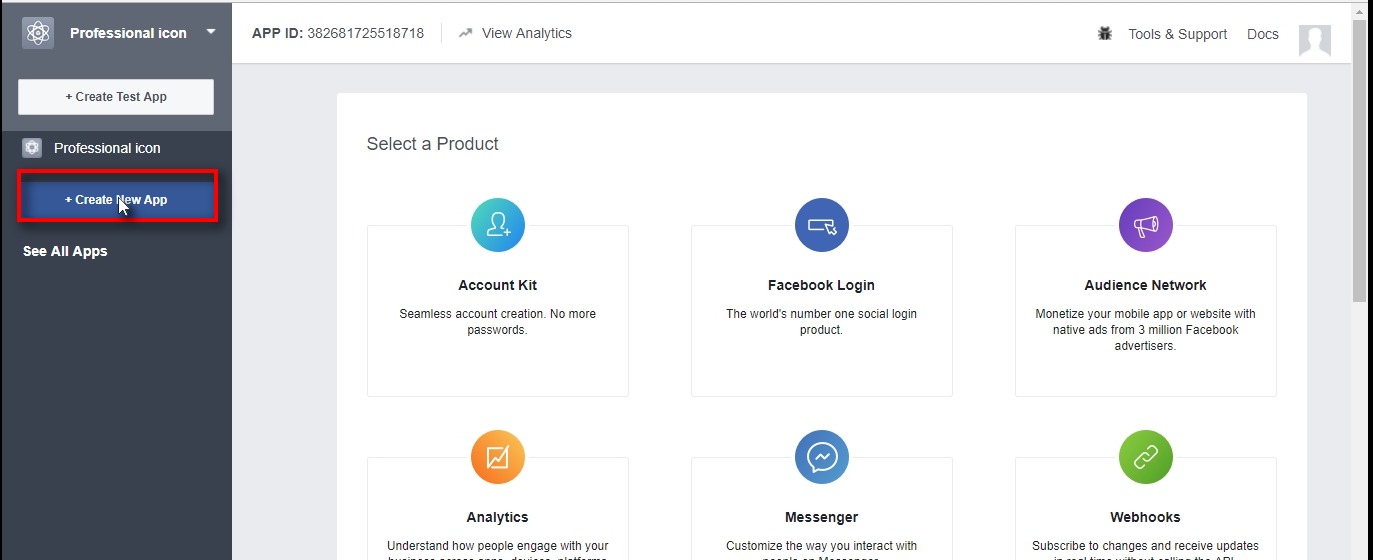
9. If you want to create another App then click on Create New App*
10. Click on your created app dashboard, at here Click on Settings >> Basic.
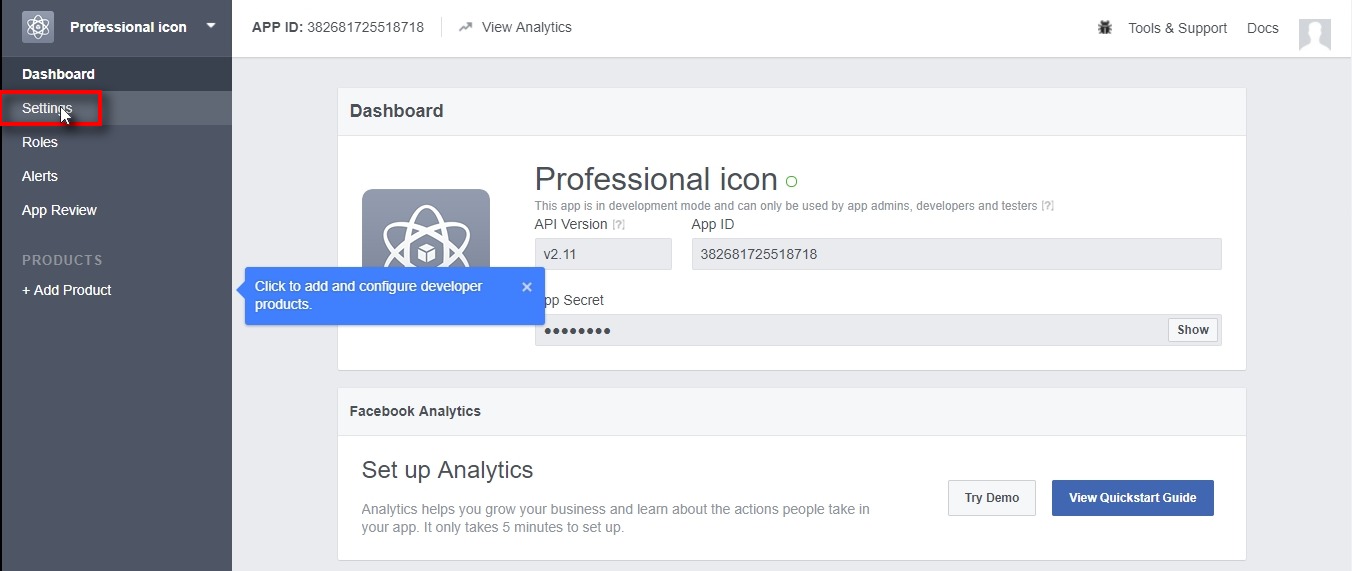
11. Click on Basic.
12. Fill the App Domains and click on + Add new at bottom of page and fill the Site URL, These URL and App Domains should match.
13. Copy the App ID.
14. Copy the App Secret.

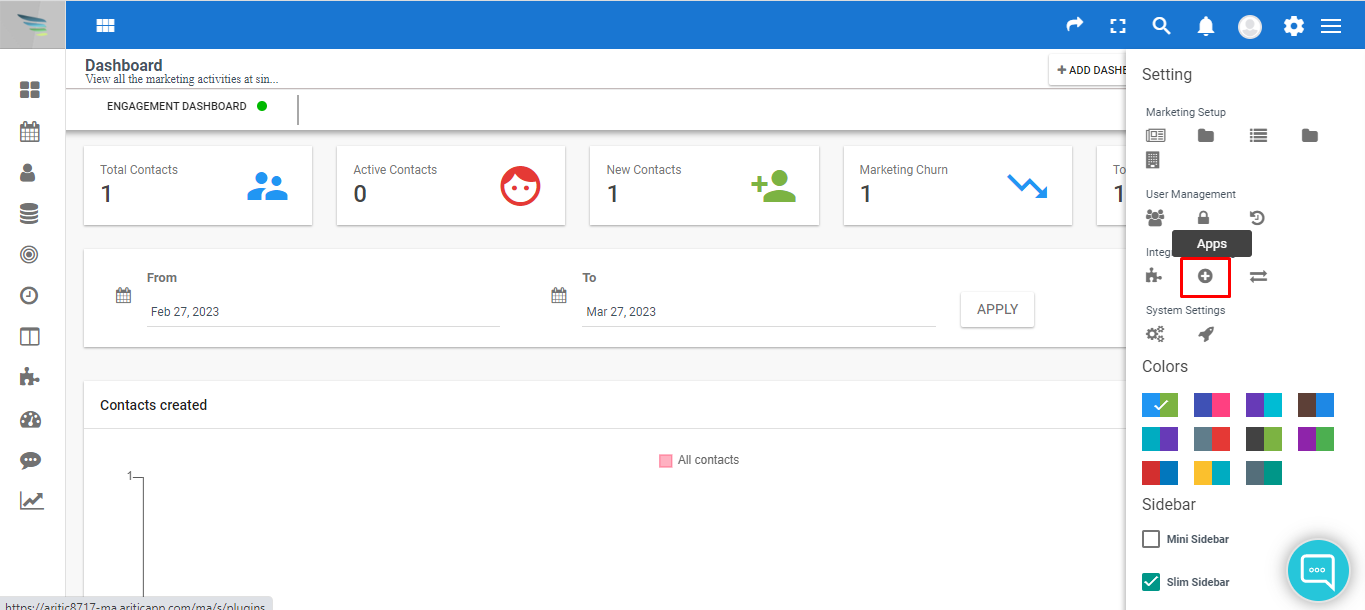
15. On the top right corner of Aritic PinPoint Dashboard, go to Settings > Plugins

16. Click on “Apps”
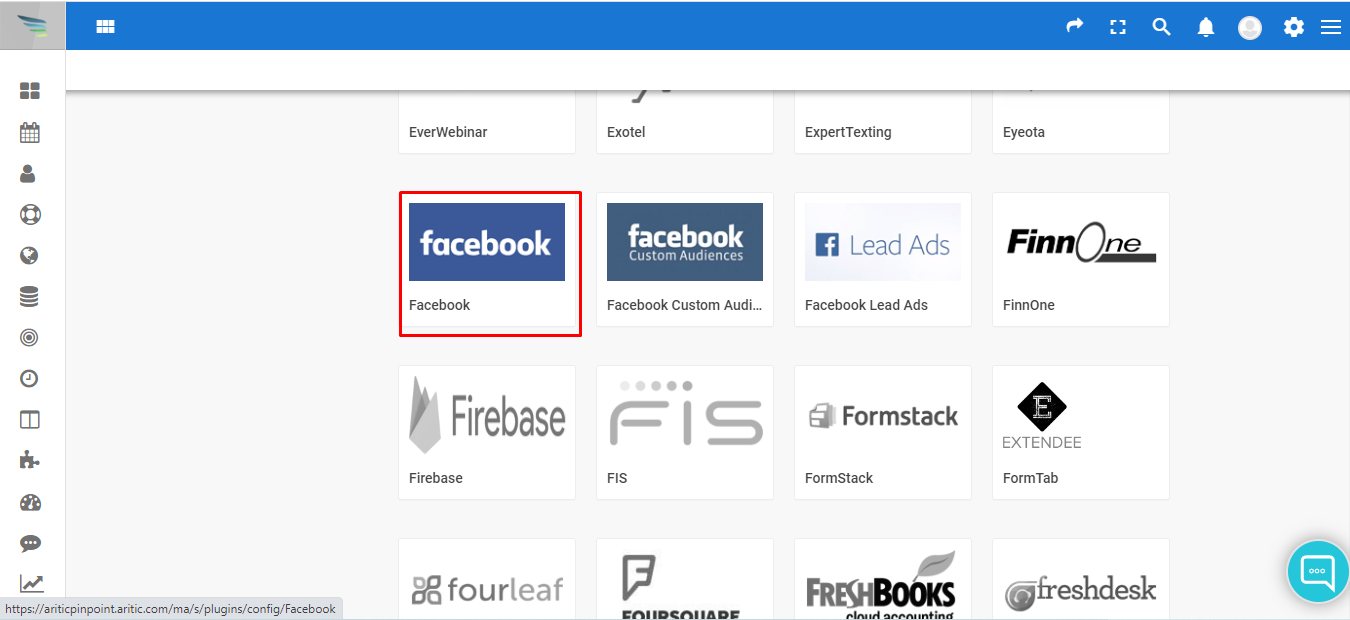
17. On the Apps page, click on “Facebook” icon
18. Now under the ENABLED/AUTH tab, you can enter your Facebook App ID and App Secret .You also have an option to either publish or unpublish it.
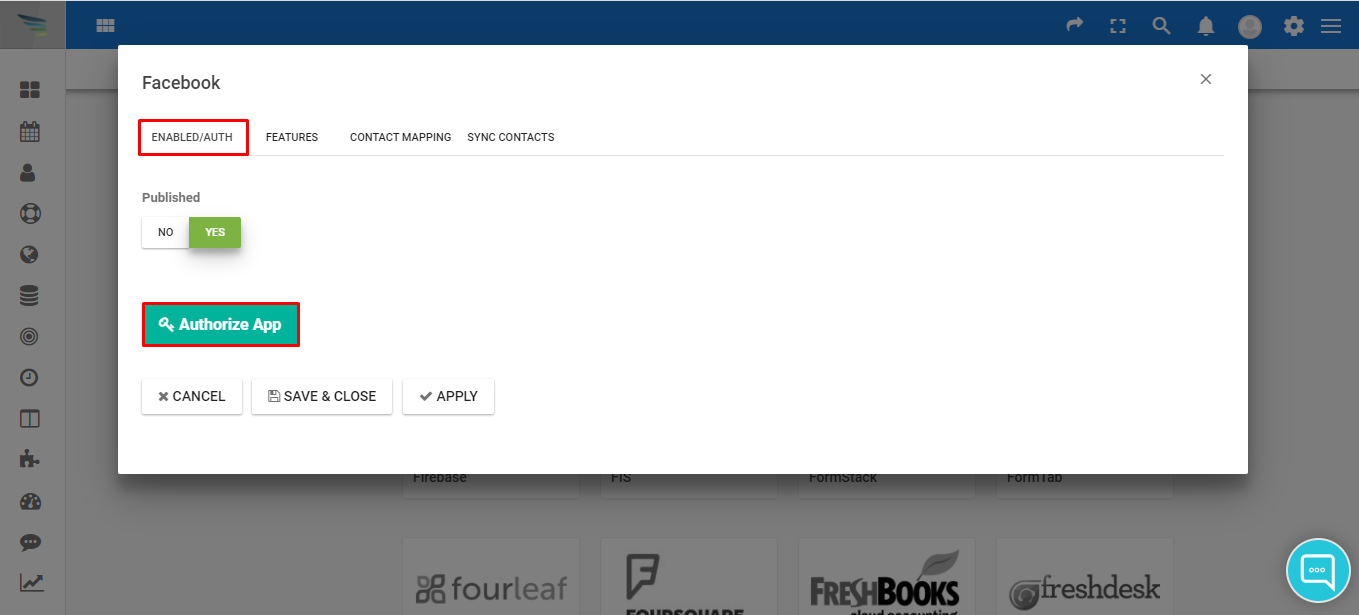
19. Click on “Authorize App” button.
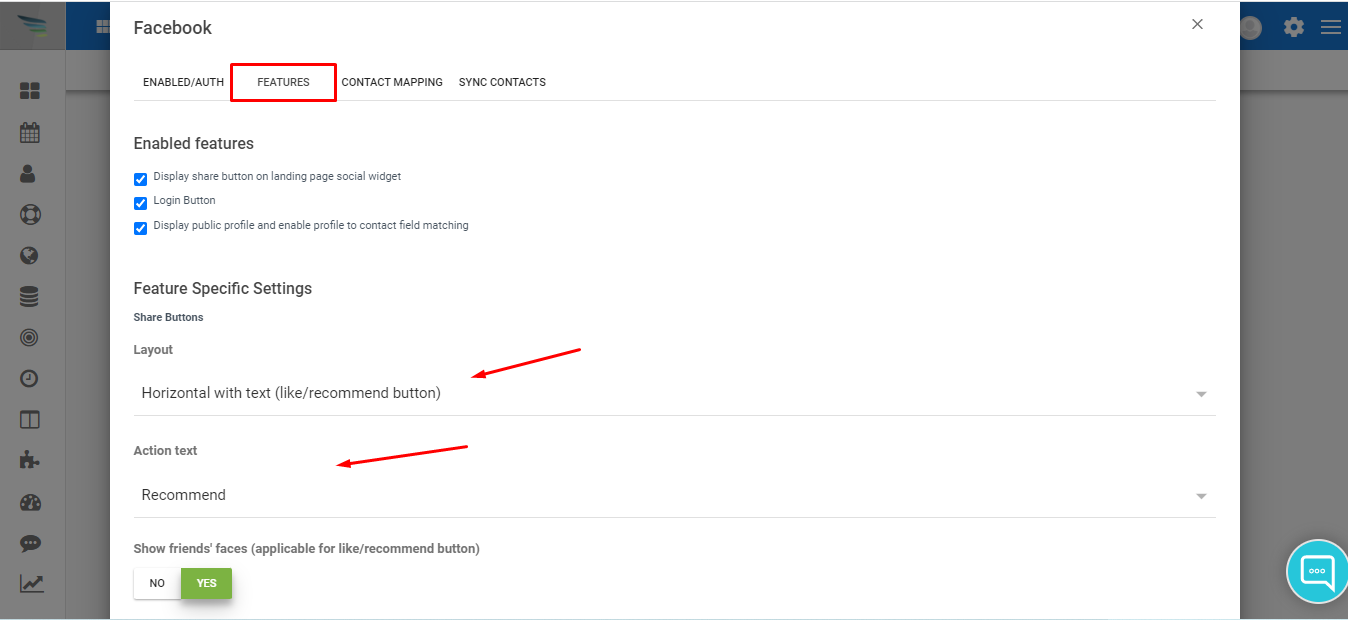
20. Under the Features tab,
20.1. you can set Enabled features like:
a) Display share button on landing page social widget
b) Login Button
c) Display public profile and enable profile to contact field matching
20.2.Here you set the Features Specific Settings
a) Share Buttons Layout like: Horizontal without count, Vertical with count and Icon(share button only).
b) Action text: Like, Share. Recommend.
c) If you will click on on Yes button your share your friend’s faces( Like, Share. Recommend)
d) Include a share button (applicable for like/recommend button)
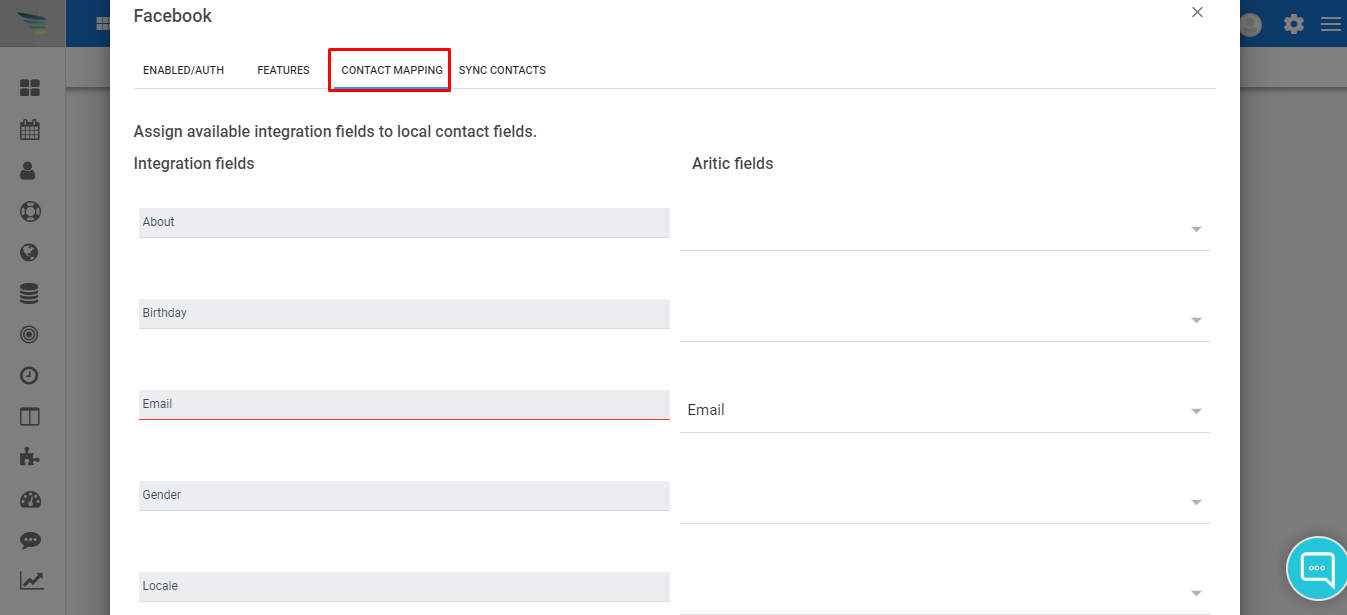
21. Under the “CONTACT MAPPING” fill the integration field and Aritic fields details.
22. Click on Apply button to apply the changes.
23. After click on Authorize button this page will appears, then if your account is already login it will redirect on Aritic Facebook page.

24. Click on Continue as ( your profile).
25. Click on “OK”

26. Click on Apply button to apply the changes.
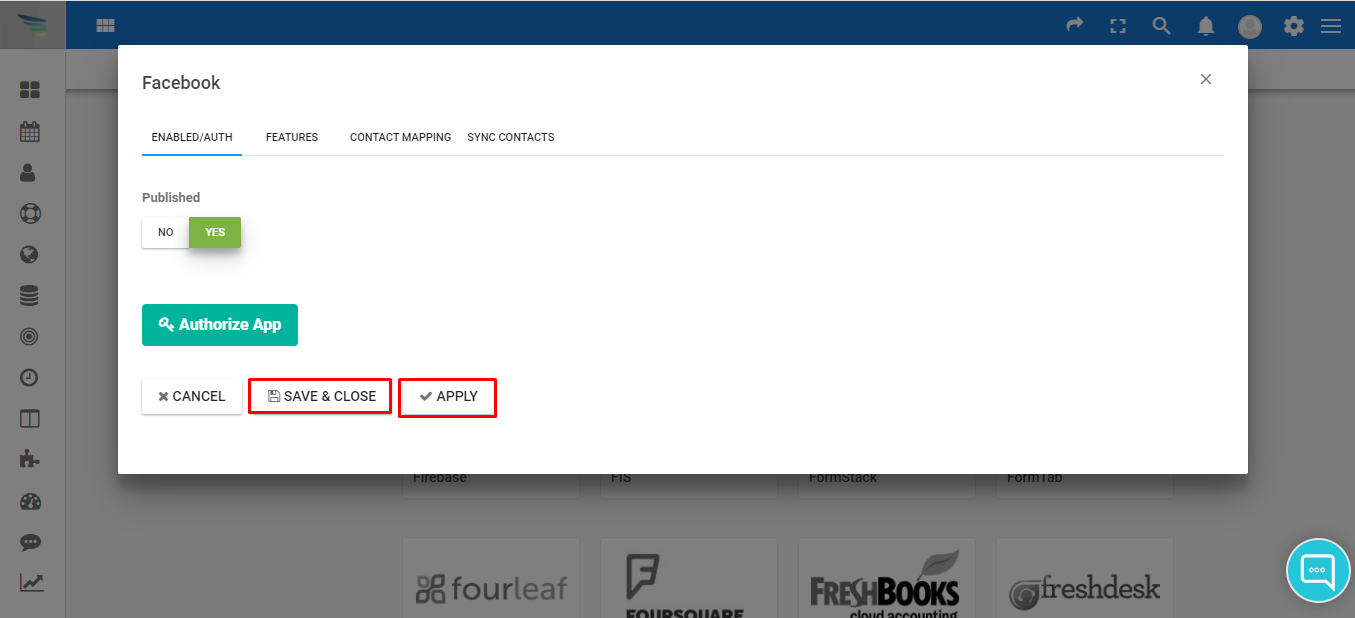
27. Click on Save & Close button to save all the information and go back to the previous